Folder sharing
If you want to share folders with other computers on your (local) network, there may be a few things to do including changing the computer's power settings.
In addition to the below information, you may also have to turn on file sharing in your antivirus/firewall application. Most these days are friendly enough to automatically allow file sharing, but not all. If you have completed the below options and still cannot connect to the shared folders, try disabling your firewall temporarily to test. Once disabled, if you can connect, check with the firewall support knowledgebase...
|
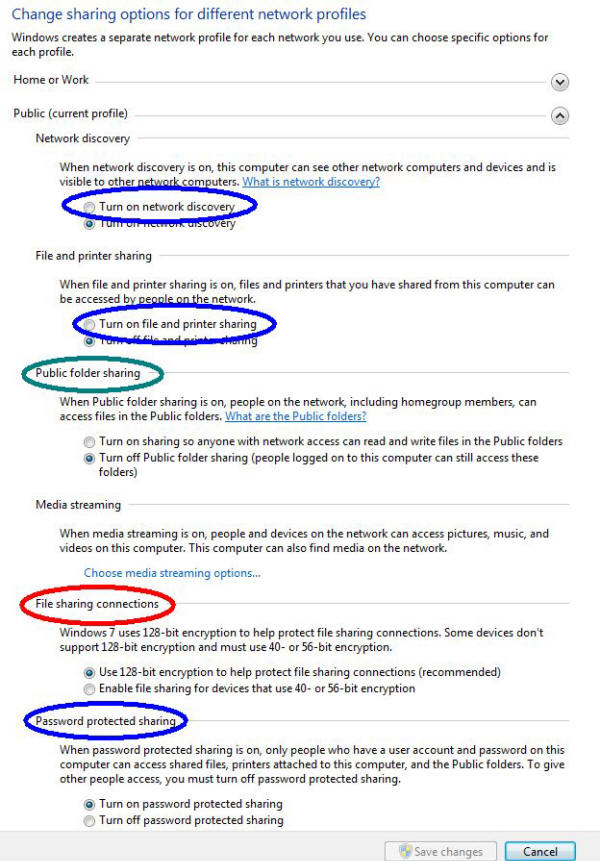
First, on both computers, right click the network icon found in the system tray and click to Open Network and Sharing. Upper left of the next window that opens (not shown), click to Change advanced sharing settings. Then look at (experiment with) the various options. |
 |
But in addition to the above, you may have to do some advanced sharing as well.
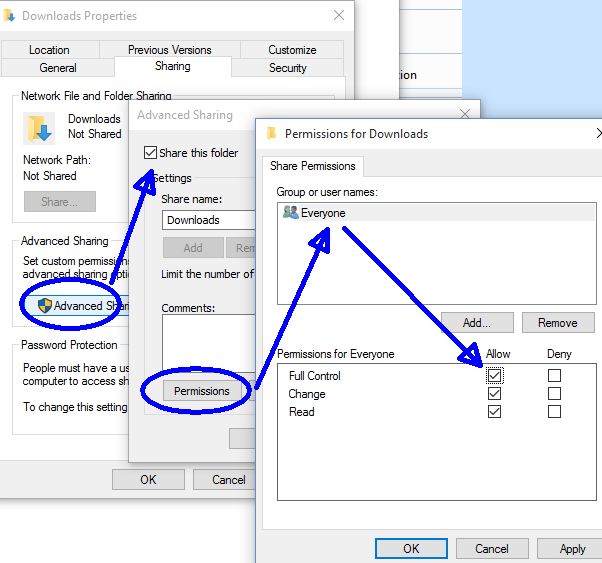
Locate the intended shared folder and right click it:
- Click the Advanced Sharing button
- Click the Share this folder option (change the share name if desired)
- Click the permissions button
- For whatever users desired (Everyone in our example), click
for Full Contol.
You can certainly allow only read privileges if desired.
Connecting to a shared folder
|
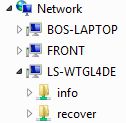
Once you have shared folder(s) and/or device(s), you can connect to them from the other computer(s). On the other computer, open the Windows File Explorer and click on or expand the Network (it may take a moment to populate). Once populated, you can see the various items on the network. Click to expand the desired computer/device as we have here with one of our external drives:
If we want to access any shared data on this device, we would then simply expand the info or recover folder to view the contents. URLURLs are used extensively by the Internet instead of IP addresses but they can also be used on your Intranet (your local network). Near the top of this image you will see \\Wdmycloud... That is a URL for our storage device. On the Internet a URL looks like http://www.bergesch.com. notice the forward slash is used, whereas local networks use the backslash. See IP Addresses for more information on those. |
 |
If you browse using the Windows File Explorer, expand the network as discussed above then click on a networked device, the addressbar at the top will show that item in the network:
![]()
If you then click into the addressbar, the actual URL is shown:
![]()
So the (URL) address to our storage device on our network is \\wdmycloudex4 (note not case sensitive). If we then click on (to open) the WCHall folder as shown we see the full URL to it: \\wdmycloudex4\wchall
IP instead of URL
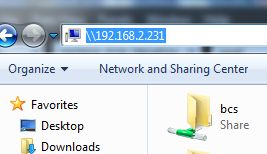
If you have problems finding a shared folder, you can try searching for and using the shared devices IP...
Mapped drives
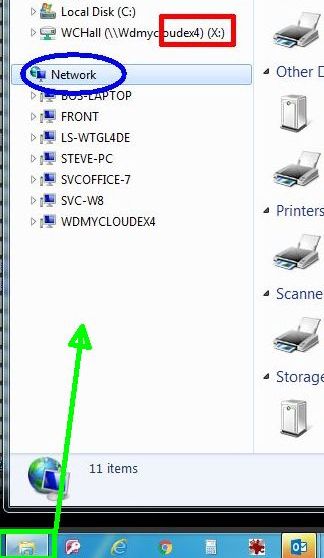
Some older applications may require a "mapped" drive to access information. In the image on right, (squared off in red) you can see we "mapped" the WCHall folder on our WDmycloud device to drive letter "X".
|
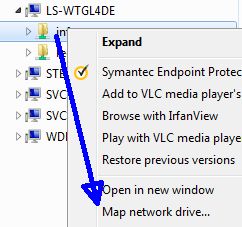
If you need to map a folder, right click the desired folder, select Map then follow the prompts. Disconnect?If you have mapped drives and reboot the computers, the computer sharing the folders should come up first. If it does not, the computer connecting to that shared folder may complain it cannot connect to the network drive and may even prompt you to connect (or not connect) on boot. If the shared folder is still active, i.e., not unshared or removed, ALWAYS choose to reconnect at boot if prompted. |
 |
- Every device shared to the network taxes resources just a bit. While a few mapped drives and connection are not noticeable, don't get carried away sharing and mapping various folders. Instead share and map the parent folder.
- HOWEVER, you should NEVER share the root / C: drive.
If the computer's power saving is set to sleep or hibernate or set to turn off the network, USB and/or hard drive, the shared folder or device will not be available. See power settings.
Printer (or device) sharing
Most printers these days are networkable, that is they connect to the network via wireless or a network cable. If you have such as device, simply run the manufacturer's software on the computer(s) to connect.
However, if an older printer or not networkable, rather it's connected via USB cable to a computer, you can share it. Very similar to sharing and connecting folders (above), on the computer sharing the device, right click the device, select Sharing and follow the prompts. On the other computer(s), open Network via the Windows File Explorer, navigate to, then right click and connect the desired device.
Printer disconnects
Extremely frustrating and it happens all too much in our opinion, networked printers become disconnected.
- Networkable printers these days use a MAC address (nothing to do with Apple) to identify themselves on the network. In fact, just like unique IP addresses, all devices on every network have a unique MAC address.
- If you change a printer with the EXACT same model, it's still a different printer to/on the network because that new printer will have a completely different MAC address.
But anyway...
It's that MAC address the manufacturer's software uses to locate and connect to networked (not shared) printers and devices. While this method is fairly stable, changes on the network can break the connection and the software may or may not be able to locate and reconnect.
|
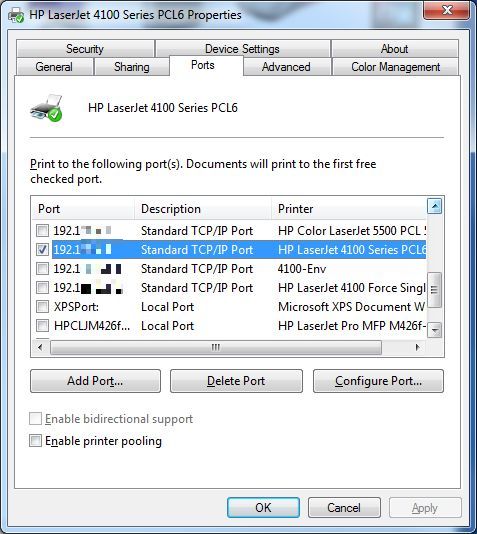
If this is troubling your network, maybe it's best to assign the printer/device it's own unique, static IP address and use that address to access the device. Static IP addresses are rock solid connections as long as a firewall does not interfere or the network address series does not change. Before you can connect this way, you must assign the printer a unique IP address. Whether this is done via software or on the printer's LED panel, this process is a bit too much to discuss here. However, once assigned to the printer... If you look at a printer's port settings (Printer Properties), you will find a variety of available ports. Not shown here, at the top of the list is the long since obsolete LPT and serial ports. But as we work down the list, we will find our static IP ports. Notes:
|
 |
