Word mail merge
|
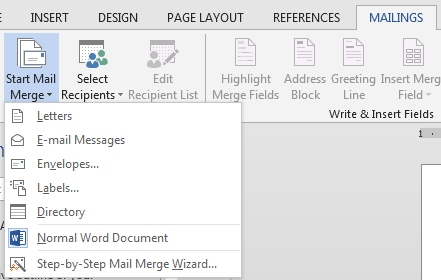
Microsoft Word has a very nice mail merge for letterhead, labels, etc. You can use mailing information from various sources including databases, another Word document, Outlook contacts and others. By You will want to experiment a bit as manually choosing vs. the Step-by-Step Wizard each have their own little quirks. We've prefer manually choosing (labels for example) over the Wizard... |
 |

Source
|
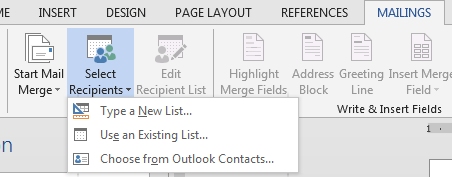
Once you have your main document setup, the next thing to do is select the mailing source. Typing a new list will open a window where you will type in all of the contact information and then save that independent file as the mailing list source. Choosing Outlook Contacts may prompt you for the Outlook Profile then the Contact list (contacts folder). |
 |
|
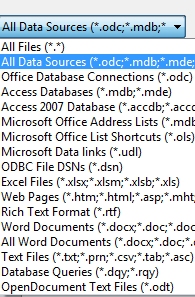
These are the various Use an Existing List sources. Whatever list will need to be laid out in such an order that you can distinguish the specific fields or columns, e.g., spreadsheets should have column headers. Access databases, best to first create a query then select that query as the source. Text files should be Tab or Comma separated but you will
have problems if the are quotes or extra commas within a
name, e.g., |
 |
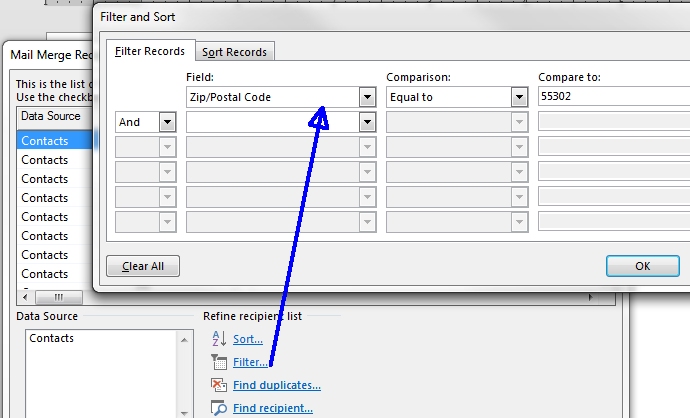
Sort/Filter
You can sort or filter the recipient list if desired. Here we are filtering the list to only those recipients in the Annandale mailing area.
Outlook Contacts
|
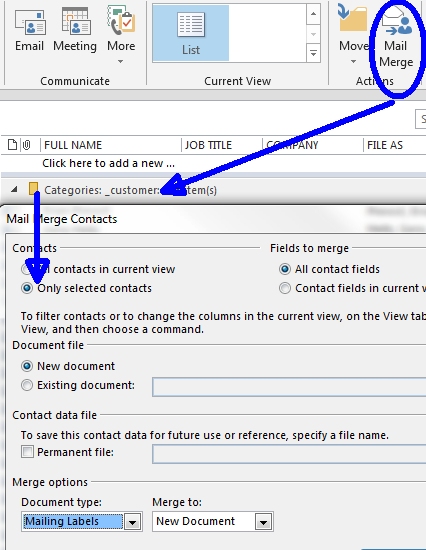
Sorely missing from the filtering capability is Outlook's categories! Mail merge will not even from Outlook contacts with a
Category selected.
You cannot use a distribution list either... Unfortunately, the best work-around we know of is to create a new contact folder then copy the recipients into that new folder and use it as the source. But in doing so, keep in mind that updating information in one folder does not update the other folder. Come on Microsoft, get it together!
|
 |
The document
|
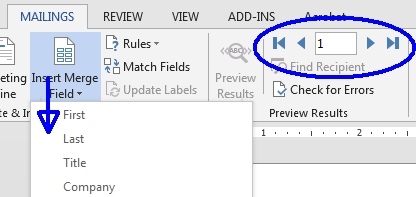
If manually setting up the document (labels for example), Insert the desired fields as shown, making sure to place a carriage return after each line as needed. Example, First and Last name on one line, a return, then the address, a return, then the City, State and Zip...
|
 |

|
Notice:
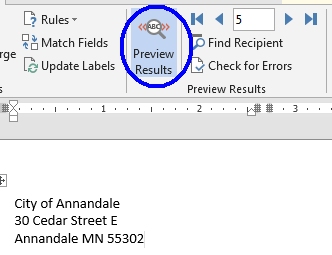
So with the Preview Results button on, you can advance through all of the records and see exactly how they will appear in the final document/printing. |
 |