Cooling system
A word of warning about using canned air. While a great way to dislodge dust, occasionally canned air may spray the liquid propellant which is at a very low temperature. If that cold liquid hits a hot chip, the CPU for example, the sudden temperature change could cause the chip to crack. So allow the computer to cool before using canned air...
Be aware:
- Lint or dust on the motherboard and other components is not much of a problem, so do not get too obsessed with cleaning.
- The thing of importance is air movement in and out of the case, around any fans and heat sinks.
- Take care not to vacuum up or disturb any jumpers or other components on the motherboard.
- Look around the case for other buildups, again being very careful, vacuum/clean those out as well.
- All work mentioned is done with the computer shutoff!
Laptops
| Laptops typically draw air in from the
bottom and discharge out the back and/or side. After
time, the intake area can become plugged with lint. Here is
a laptop that is nearly
completely plugged. Flip the computer over - using a vacuum hose and a small pick you can clean most of these fairly easily, but be careful not to over spin the cooling fan with the vacuum. Draw on it just enough for the lint to surface then pick it from there. Continue until no lint remains. Just make momentary contact to the slots with the vacuum, just enough to spin the fan backwards pulling the lint up where you can pick it. Obviously do not dig too deep or too hard with a pick. There's lots of electronics down there, plus you do not want to damage the fan's fins... Desktops as well have intake areas. Generally at bottom of front panel and in the back at the power supply. Same precaution - only with the computer off and do not over spin the fan... |
 |
Towers (slim towers below)
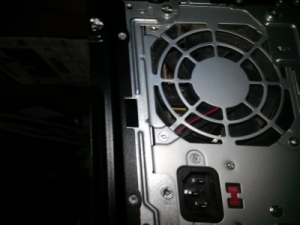
Remove the computer's (side) cover for access to the interior and look for troubled spots, typically the CPU fan/heat sink and the power supply from inside the cover and outside from the back...

Mini/slim towers
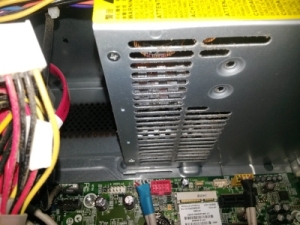
As above, vacuum out the back venting area for the power supply. Next, you will need a vacuum with an attachment hose, maybe a small Phillips screwdriver, Q-Tips and some care...
|
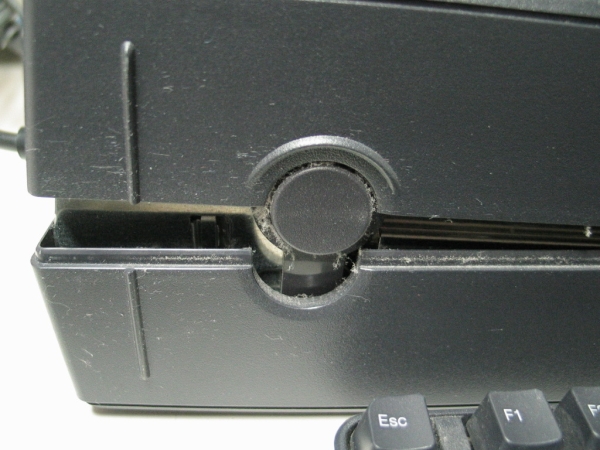
Open the case. Case opening varies between manufacturers, this is an older Dell Dimension...
|
 |
|
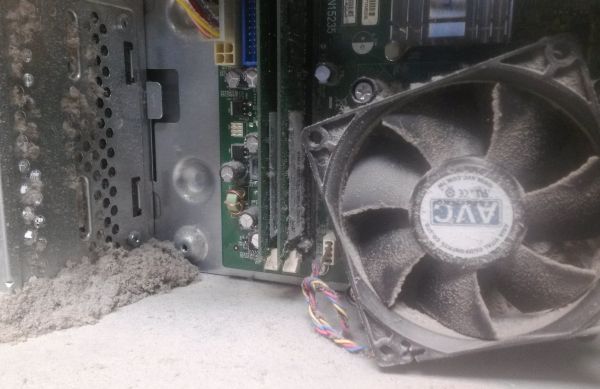
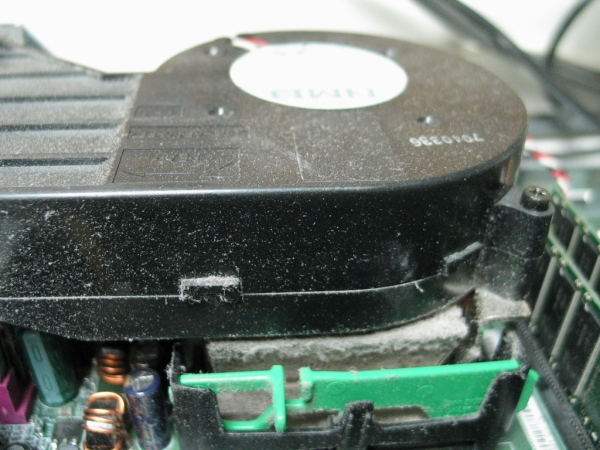
Look around for the troubled spots. Notice the cooling fins are plugged with lint. Do NOT remove the assembly using the green release levers.Doing so will break the thermo grease seal and that will result in a CPU failure! If your design is different and you cannot tell how to remove just the fan, close the cover and bring it to someone who knows... |
 |
|
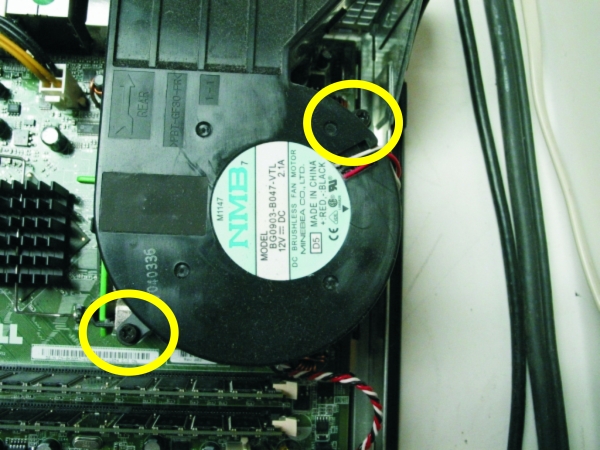
You need to do is remove ONLY the fan. Typically it is held down by two or more screws. Remove the fan mounting screws that hold the fan in place. Be careful... Lift the fan then flip it up side down. |
 |
| Inspect the fan itself for lint balls or a buildup of dust and clean those out. |
 |
|
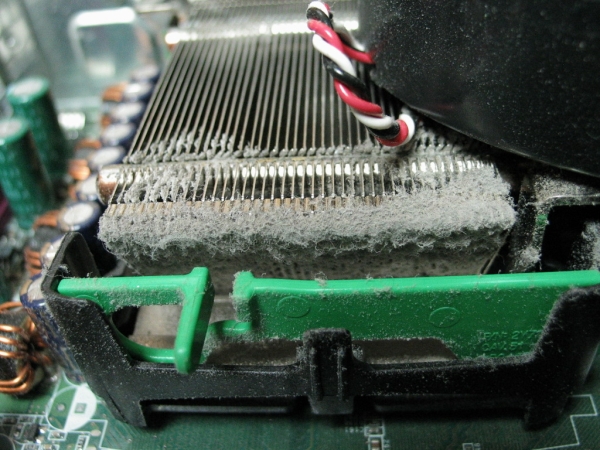
Vacuum out the cooling fins, then reinstall the fan, being careful not to pinch or damage wiring. The fan screws need only be snug! Do not over tighten them... Important Note: The typical vacuum attachment is too large to completely clean this area, so CAREFULLY use a Q-Tip or other non-metal item to lift the lint up while vacuuming.
|
 |